
The funny thing about writing a blog, is that I never know how popular my recipes will be. Often, I think I have a real zinger and no one really seems to appreciate it on the same level as I do. Then I post something rather simple and everyone goes nuts about it. Curious.
You can imagine then, that when I posted The Life Changing Loaf of Bread, how incredibly shocked I was at the response. Although I was pretty confident that I had a winning recipe, I never expected the explosive reaction that it got. After checking up on it today, the post has over 1,200 comments. WHAT?! That is insane. And thank you. I’m so glad it changed your life too.
In the spirit of recipes that shake up our routine, I thought I would introduce you to the very same one all over again. That’s right. The same recipe with a new method to make the most life-changing crackers you have ever tasted.

The story goes like this: it was the night before a long trip, and I knew that I needed to make some food to take with me on the journey. I didn’t have a lot on hand, nor did I have a lot of time. Searching through the cupboards I realized I had almost everything to make The Life Changing Loaf of Bread, but because I was traveling with it, I wanted it to be a little more transportation-friendly (nothing like biting into an entire loaf of bread on an airplane to make you look like a total kook). A light bulb moment: what if I made the dough and just flattened it out like a cracker? It was just crazy enough to work! Crispy, crunchy, flaky, seedy, and so tasty, this crispbread that is my new go-to for every meal of the day, and snacking in between.
The wonderful thing about the Life Changing Cracker recipe is that you can customize the flavours by adding different gourmet ingredients. You can take them to sweet or savoury town. You can throw in some superfoods if you like, or just stick to the plain, yet delicious base recipe.
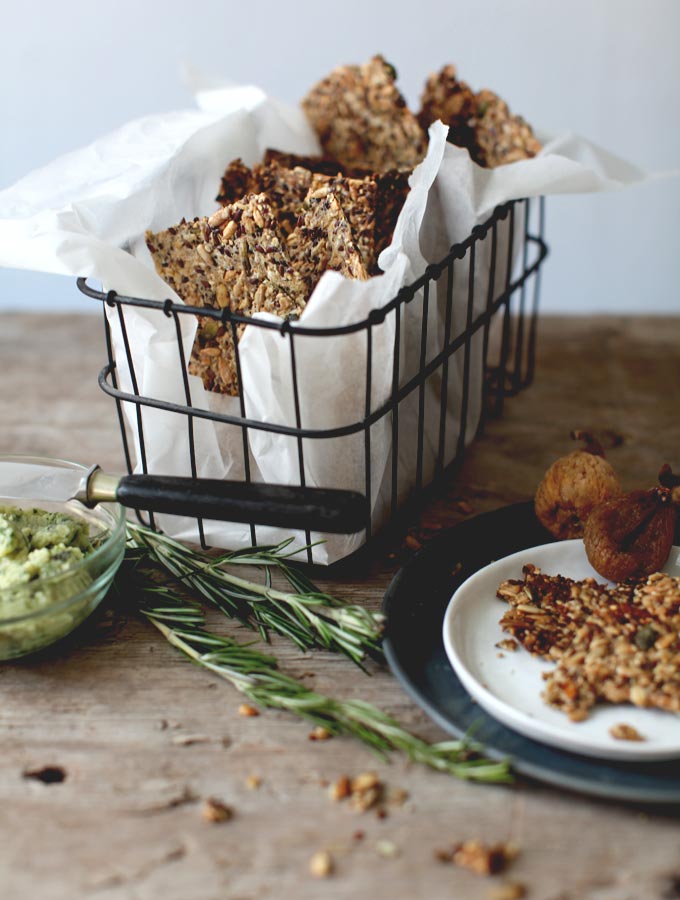
I love dividing up the dough and creating multiple kinds of crackers all in the same batch. I made two different versions last time: Rosemary, Garlic & Smoked Sea Salt, and Fig, Anise & Black Pepper. Both were totally delicious and worked well with dips, spreads, and cheese. I also really enjoyed them on their own, totally unadorned. Because I loved these combos so much, I’ll give you the recipes for them below – just remember that they are for half a batch of dough respectively.
The Life Changing Crackers can be made into any shape you like too, so get creative. Use cookie cutters, biscuit cutters, pasta or pastry cutters if you have them. A simple knife works too. And if you like things rustic bake the whole tray until crisp, then break them up in free form pieces before storing them.

The Life-Changing Crackers
Makes 2 baking sheets of crispbread
Ingredients:
1 cup / 135g sunflower seeds
½ cup / 90g flax seeds
1/3 cup / 50g pumpkin seeds
¼ cup /40g sesame seeds
1 ½ cups / 150g rolled oats
2 Tbsp. chia seeds
4 Tbsp. psyllium seed husks (3 Tbsp. if using psyllium husk powder)
1 ½ tsp. fine grain sea salt
1 Tbsp. maple syrup (for sugar-free diets, use a pinch of stevia)
3 Tbsp. melted coconut oil or ghee
1 ½ cups / 350ml water
Rosemary, Garlic and Smoked Salt
Half batch:
2 Tbsp. chopped fresh rosemary
¼ – ½ tsp. garlic powder (depending on how strong you like it)
smoked sea salt, to taste
Fig, Anise and Black Pepper
Half batch:
3 large dried figs (approx. 70g)
1 tsp. anise seed
1 tsp. cracked black pepper
Directions:
1. In a large bowl combine all dry ingredients, stirring well. Whisk maple syrup, oil and water together in a measuring cup. Add this to the dry ingredients and mix very well until everything is completely soaked and dough becomes very thick (if the dough is too thick to stir, add one or two teaspoons of water until the dough is manageable). Divide the dough roughly in half, and set aside one half.
2. Place one half of the dough back into the bowl and add any flavouring you like. Gather into a ball and place it between two sheets of baking paper. Using a rolling pin, firmly roll out into a thin sheet. Remove top layer of baking paper and using the tip of a knife, score the dough into shapes you like (I chose large rectangles but it’s up to you). Repeat with remaining half of dough. Let sit out on the counter for at least 2 hours, or all day or overnight.
3. Preheat oven to 350°F / 175°C. Using the baking paper, slide the dough onto a cookie sheet and bake for 20 minutes. Remove cookie sheet from oven, flip the whole cracker over (if it breaks a bit, don’t worry!) and peel the baking paper off of the back. Return to oven to bake for another 10 minutes, until fully dry, crisp, and golden around the edges.
4. Let cool completely, then break crackers along their scored lines and store in an airtight container for up to 3 weeks.
Walang komento:
Mag-post ng isang Komento